Merge Photo and Signature Online

 If you want to be simply attach  a photo and a signature into a single image, it is a common requirement for professional documents, job applications portals, and govt forms or online verification app in today.

Here steps to steps   follow  this  system uploaded data preparation and  find requires  result as you need from this tool (www.cscac.in).

Before we merge photo and signature , your source files  firstly need to be clean. A high-quality merge starts with high-quality raw data.

Preparing the Photograph.

First, follow these steps in an easy way in three steps.

  1. Lighting: The photo has been taken in proper lighting. At that time, avoid harshness, darkness, or shadows on the face.
  2. Background: For the professional official documents, use a plain white or off-white background photo.
  3. File Format: Finally, save in the system as a high-resolution JPEG or PNG format.

Preparing the Signature.

After those photo steps, follow these steps in an easy way in three steps for signature.

  1. The pen color matters: Here use a black-tip pen or a dark gel pen. Blue ink pen mostly try to avoid .
  2. The White Paper: Use plain, avoid lined white paper.  Here we know that lines mark  on the paper will create extra work for you later. Its time taken.
  3. Digitized image : Scan it at 300 DPI mode or set it in  a top-down photo in bright, natural light mode.

2. A: The Desktop Professional user (Adobe Photoshop)

If you need the most exact look where the signature fits to be naturally placed on the document or photo, Adobe Photoshop is the standard option for desktop users.

Fit the signature.

  1. Firstly, open your signature file as you saved it in the system.
  2. After that go to Select > Color Range. Mouse click the black ink of your signature.
  3. Then properly adjust the “Fuzziness” slider until the signature is crisp and the white background of the sign is ignored.
  4. After that, press Ctrl+J (Windows) to jump the selection to a new layer. You now have a transparent signature.

Step 2: Prepare in the CSC designer tool.

  1. Open your portrait photo in the system. Drop the photo and signature here.
  2. If the form requires a specific size (e.g., 2×2 inches), use the size tool set bar of photo and signature to set those dimensions and also DPI. See preview and get it final exact result. (www.cscac.in).

Step 3: Merge the photo and signature.

  1. Here drag the transparent signature layer onto the photo image tab.
  2. After that, press Ctrl+T to transform. Hold shift key to maintain proportions and resize the signature to fit the bottom corner in the tab.
  3. Pro Advance Tip: Change the Layer Blend mode to Multiply. This ensures any stray grey pixels from the paper disappear, leaving only the dark ink here.

Step 4: Export the merged photo and signature.

  • Now go to File > Export > Export As in the system. Here, as per need, choose JPG (if the background is solid) or PNG (if you need to maintain transparency for other uses).

3.B: The “No-Software” (only Online Tools)

If you don’t want to install anything in the system, online editors like CSC Designer or Canva or directly visit www.cscac.in in the browser URL. Those are your best friends.

Using the CSC designer tool

  1. Open your portrait photo in the system. Drop the photo and signature here.
  2. If the form requires a specific size (e.g., 2×2 inches or KB), use the size tool set bar of the photo and signature to set those dimensions and also DPI. See the preview and get it final exact result. (www.cscac.in).
  3. Download: Save as a “JPG” at 100% quality without losing image quality.

4. C: The Mobile Power User (iOS & Android)

Sometimes you need to apply for a job on the go. You can do this entirely on your smartphone.

Use CSC Designer or visit www.cscac.in.

  1. Open the mobile browser : open the Google search engine and type “CSC designer.”
  2. Find  www.cscac.in:-  click on it first. Drop down to see the merge photo and signature tools within the page.
  3. After that click , open the merge photo and signature display tool.
  4. Here drop the prepared photo and signature image one by one.
  5. Use the size tool bar as you require KB and DPI dimensions in the tool. Set it properly. Click it preview button. Analysis and finally download a 100 % jpg or png image without losing quality.

6. Save: Export to your mobile gallery and use it.


  • D: The Microsoft Office Workaround.

In this desktop system, believe it or not,  Microsoft Word and PowerPoint are surprisingly good work   at this.

  1. Open Ms PowerPoint: This is better than Ms Word for layering images.
  2. Insert Images: After that, insert both the photo and the signature-prepared image.
  3. Remove Background: Click the signature.
    • Go to Picture Format > Remove Background.
    • Mark areas to keep (the ink) and areas to remove (the white paper).
  4. Layering: In this section place the signature over the photo image.
  5. The “Merge”: Select both images (hold Ctrl and click both). Right-click the mouse and select “Save as Picture.” Choose JPEG. This merges them into one single file image without loss of quality.

6. Technical Requirements & Troubleshooting .

Standard file  format and size.

Most official(govt,job portals have strict limits of size KB).Here  use this table as a checklist for perfect result:

Feature RequirementHow to Fix issue
File SizeUsually < 500 KBUsing an online “Image Compressor.”
DimensionsOften 3.5cm x 4.5cmUsing the “Crop” tool to set aspect ratio.
Resolution300 DPI(dot per inch)Ensure your initial scan isn’t “low resolution.”
FormatJPG ,jpeg, png or PDF“Save As” the specific extension mode in system.

Common Issues are comes here to get a perfect result.

  • If The Signature looks “Grey”: Increase the Contrast on the signature image before merging. You want the blacks to be deep and the whites should be bright.
  •  If The Photo is Blurry: This normally happens if you try to use “upscale” a small thumbnail. Always start with the largest version of the photo you have in the system.
  • The Box Effect: If your signature image has a white box around it that covers your shirt in the photo, you haven’t set the blend mode to Multiply or removed the background in a proper way.

7. Summary

  1. Clean: Firstly, be sure to remove the background from the signature.
  2. Scale: After that, resize the photo to the required dimensions in forms.
  3. Place: Adjust the position of the signature (usually bottom-right or centered at the bottom)as per required.
  4. Flatten: Merge the layers so they cannot be moved.
  5. Compress: Ensure the final file size meets the portal’s requirement of limit.

Note:- CSC designer tools , prefer your data safety and secure. Not your data upload in any other server.  It is fast and lightning-processing through on mobile or system browser. Easy to use this tool in merge photos and signatures in a second.

Compress Image to 200kb Online

The perfect guide to compress image to 200kb.

If you need to compress an image to 200KB, you can try different methods based on whether you are using Windows, Mac, Android, iPhone, or online tools. Here’s a straightforward step-by-step guide covering all the main simple methods.

  • Method 1: Firstly, you are to compress the image to 200KB using online tools (a simple method). This works well if you prefer not to need to install any software. –
  • Step 1: Now open your URL browser. Open Google Chrome, Edge, or any browser. –
  • Step 2: Now Open Image Compression Website Visit any of these trusted websites: TinyPNG, iLoveIMG, Compress JPEG, Squoosh
  • Step 3: Here, Upload Image Click the Upload button and select your image. 
  • Step 4: Here Adjust File Size Some websites let you: Set a custom size (enter 200 KB) Use a quality slider. Gradually reduce quality until the file size reaches 200KB or less.
  • Step 5: Download Click Download and save the compressed image. Done.
  • Method 2: Compress to 200KB in Windows Without Software You can use Paint, which is already installed on the PC.
  • Step 1: Using mouse right Click on  Image Click → Open with → msPaint –
  • Step 2: Perform Resize Image and  Click Resize → Choose Pixels Reduce the width (for example, from 4000px to 1200px) Keep “Maintain aspect ratio” checked. Click. OK –
  • Step 3: Save As JPEG format. Click: File → Save As → JPEG picture. JPEG format gives a smaller size. –
  • Step 4: Perfectly Check Size Right-click the image → Properties → Check if it is near 200KB. If it is still large: Repeat resizing and lower the pixel count further.
  • Method 3: Compress to 200KB Using Photoshop—
  • Step 1: now you open the image file → Open—
  • Step 2: Now Export for Web File → Export → Save for Web (Legacy) –
  • Step 3: Here, select JPEG. Choose: Format: JPEG Quality: Reduce (50–60%) You can see the file size preview in the bottom left. –
  • Step 4: Then adjust the quality decrease until the size shows near 200 KB.
  • Step 5: Finally, save professional-quality compression done.
  • Method 4: Compress to 200KB Using Squoosh (Advanced Control)
  • Go to Squoosh .
  • Steps: Now here is uploading the image. Then select the format: JPEG. Perform  Adjust the quality slider. Then resize the image width (if needed). Check the live file size preview. Download when it is near 200KB. Use the best for precise control.
  • Method 5: Compress to 200KB on Android Phone
  • Option 1: Right here: Using an app to download on your smartphone: Photo Compressor: Photo Image Size from Google Play.
  • Steps: Install the app. Open the image. Choose “Compress.” Set custom size → 200K B. Save.
    • Option 2: Without App (Online) Use: TinyPNG, cscdesigner, and iLoveIMG. Upload → Compress → Download.
  • Method 6: Compress to 200KB on an iPhone 
  • Option 1: Use an app. Download a compression app from the App Store.
  • Option 2: Use a website. Open Safari → Use TinyPNG , Squoosh, or www.cscac.in.
  • Important Tips to Reach Exactly 200KB If your image is very large (5MB+), consider the following steps: –

If we need to reduce the resolution of the image, for example, from 4000×3000 to 1200×900 or 1000×750. – Convert PNG to JPEG. PNG files are larger. JPEG files are smaller. – Lower Quality to 50–60%

Most images look fine even at 60%. Shows the final result.

Best Settings for 200KB Target Image Type Recommended Width Quality Passport Photo 600px 70% Website Image: 1200px, 60%; ID Card: 800px, 65% Document Scan 1000px 50% Common Problems & Solutions: Image Still Above 200KB – Reduce the width more. – Lower the quality. – Convert PNG to JPEG. If the image looks blurry, then increase the quality slightly. – Here, do not go below 40%.

  • Tips for Website Owners Since you run an electronics and MLM website, compressing images to 200KB helps:
  • Faster website speed.
  • Better Google ranking.
  • Lower hosting load.
  • Better user experience.

We even use WordPress plugins (like Smush).

Automatic compression tools.

Here is the finally quick formula. To compress an image to 200KB: Convert to JPEG. Resize the width between 800 and 1200 px. Set quality to 50–70%. Download and check the size.

Related question and answer.

Q1. How to Compress an Image to 200KB Without Losing Quality?

ANS:

1: Need to first Convert image to JPEG
PNG is bigger. Use JPEG format.

2: Resize image
Reduce width to 800–1200px.

3: Use Smart Compression Tool
Use:

  • Squoosh
  • TinyPNG
  • I love image.
  • Csc designer

4: Now here, adjust the quality slider.
Keep it between 60% and 75%.

Step 5: Download when size is near about 200K. B.

Tip: The file format shouldn’t be reduced below 50% quality to avoid a blurry result.


Q2. How to Make Passport Size Photo Under compress image to 200KB?

ANS:

1: Now resize to 600×600 pixels
 2: Save as JPEG
 3: Set quality to 70%

 4: Check file size in Properties

If still large:
Reduce to 500×500 pixels.

Best tools:

  • iLoveIMG
  • Compress JPEG

Q 3. How to Compress an Image to 200KB in Mobile (Android)?

ANS:-

 1: Install compression app from
Google Play

Search: Photo Compressor

 2: Open image
 3: Select “Custom Size”
4: Enter 200KB
5: Save image

✔ Done.


Q4. How to Compress an Image to 200KB for a Government Form?

ANS:-

Many Indian forms require an image under 200KB.

 1: Scan photo in 150–200 DPI
2: Resize width 600–800px
3: Save as JPEG
4: Reduce quality to 60%
5: Check file size

Use:

  • Squoosh

Q 5. How to compress image to 200KB exactly?

ANS:-

1: Upload image to Squoosh
2: Enable Resize
3: Adjust width slowly
4: Move quality slider
5: Watch live file size preview

Adjust until it shows 198–200KB.

✔ This method gives exact control.


Q 6. How to Reduce Image Size From 5MB to 200KB?

ANS:_

1: if we need to Convert PNG → JPEG
2: Resize from 4000px → 1000px width
3: Set quality 50–60%
4: Save and check size

If still above:
Reduce to 800px width.


Q7. How to Compress Image to 200KB in Windows Without Software?

ANS:

1: using mouse cursor  Right-click the image.
2: Open with → Paint
3: Click Resize
4: Reduce width to 1000px
5: Save As → JPEG
6: Check file size finally and download it.

Repeat resize if needed.


Q 8. How to Compress Image to 200KB in Photoshop?
ANS:_

Using Adobe Photoshop in system

1: Need to first open image
2: File → Export → Save for Web
3: Select JPEG
4: Reduce quality to 55–65%
5: Check preview size
6: Save


Q9. Best Free Website to Compress Image to 200KB?

ANS:

Trending Tools:

  • Csc designer
  • TinyPNG
  • Squoosh
  • iLoveIMG

✔ All are free
✔ No registration needed here.


Q 10. Why Is My Image Still Above 200KB?

ANS:_

 Here I mention below Common Reasons:

❌ Resolution too high.
❌ PNG format.
❌ Quality set too high
❌ Image has too much detail

Solution:

✔ Reduce width
✔ Lower quality
✔ Convert to JPEG

you-tube-thumnail-background-png-design-expert

Cerate YouTube Thumbnail and Background


  • Canva एक बेहतरीन ग्राफिक्स डिज़ाइन टूल है जो आसानी से थंबनेल और बैकग्राउंड बनाने में मदद करता है।
  • इसमें आपको पहले से बने कई टेम्पलेट्स मिलेंगे जिनका इस्तेमाल कर आप आसानी से एक आकर्षक थंबनेल डिज़ाइन कर सकते हैं।
  • Canva का उपयोग करने के लिए आपको किसी विशेष डिज़ाइनिंग कौशल की आवश्यकता नहीं होती, इसके सरल इंटरफेस की मदद से आप कुछ ही समय में एक पेशेवर डिज़ाइन तैयार कर सकते हैं।
  • Photoshop पेशेवर ग्राफिक डिजाइनरों का सबसे पसंदीदा सॉफ्टवेयर है।
  • इस टूल का उपयोग करके आप अपनी खुद की कस्टम डिज़ाइन बना सकते हैं और थंबनेल को पेशेवर लुक दे सकते हैं।
  • यह टूल आपको उन्नत संपादन और डिज़ाइनिंग सुविधाएं प्रदान करता है, जिससे आप अपनी कल्पना को वास्तविकता में बदल सकते हैं।

3. Fotor

  • Fotor एक और ऑनलाइन टूल है जो विशेष रूप से थंबनेल और बैकग्राउंड डिज़ाइन करने के लिए लोकप्रिय है।
  • इसका इंटरफेस भी बहुत सरल है और यह कई मुफ्त टेम्पलेट्स और डिज़ाइनिंग विकल्प प्रदान करता है।

4. PicMonkey

  • PicMonkey एक सरल और प्रभावी टूल है जिसका उपयोग YouTube थंबनेल और चैनल आर्ट बनाने के लिए किया जा सकता है।
  • इसमें बेहतरीन टेक्स्ट और इमेज एडिटिंग फीचर्स होते हैं।

5. Snappa

  • Snappa एक और टूल है जो विशेष रूप से सोशल मीडिया और YouTube के लिए ग्राफिक डिज़ाइनिंग का काम करता है।
  • यह भी उपयोग में बहुत आसान है और इसके साथ आप जल्दी से थंबनेल और बैकग्राउंड बना सकते हैं।

3. थंबनेल और बैकग्राउंड डिज़ाइन करने की प्रक्रिया

1. थंबनेल डिज़ाइन करने की प्रक्रिया

  1. थंबनेल के लिए सही साइज का चयन करें
    YouTube थंबनेल का आदर्श साइज 1280×720 पिक्सल होता है। इससे कम रिज़ॉल्यूशन वाली छवि धुंधली या पिक्सलेटेड दिख सकती है।
  2. एक आकर्षक इमेज का चयन करें
    थंबनेल के लिए ऐसी इमेज का चयन करें जो आपके वीडियो की सामग्री को स्पष्ट रूप से प्रदर्शित करे। इमेज का रंग और गुणवत्ता आपके वीडियो की विषयवस्तु से मेल खानी चाहिए।
  3. उज्ज्वल रंगों का उपयोग करें
    उज्ज्वल और कंट्रास्ट वाले रंगों का प्रयोग करें ताकि थंबनेल दूसरों से अलग और अधिक आकर्षक दिखे। जैसे पीला, लाल, नीला रंग दर्शकों का ध्यान तेजी से आकर्षित करते हैं।
  4. टेक्स्ट का सही उपयोग करें
    थंबनेल पर छोटा और प्रभावी टेक्स्ट जोड़ें। टेक्स्ट को इस तरह से रखें कि वह तस्वीर के साथ मिलकर जानकारी प्रदान कर सके और पाठक को क्लिक करने के लिए प्रेरित कर सके।
    • फोंट सरल और पढ़ने में आसान होना चाहिए।
    • बोल्ड और स्पष्ट टेक्स्ट का उपयोग करें ताकि वह थंबनेल पर स्पष्ट दिखे।
  5. विजुअल एलिमेंट्स का प्रयोग करें
    अगर संभव हो, तो तीर, बॉर्डर, आइकन आदि का उपयोग करें ताकि आपकी इमेज अधिक ध्यान खींच सके। ये छोटे-छोटे विजुअल एलिमेंट्स आपके थंबनेल को खास बना सकते हैं।
  6. ब्रांडिंग जोड़ें
    अपने थंबनेल में अपने चैनल का लोगो या कोई विशेष ब्रांडिंग एलिमेंट जोड़ें ताकि आपकी पहचान दर्शकों को बने। इससे दर्शक आपके चैनल को बार-बार पहचान सकेंगे।

  1. चैनल आर्ट के लिए सही साइज का चयन करें
    YouTube चैनल आर्ट के लिए आदर्श साइज 2560×1440 पिक्सल होता है। यह सुनिश्चित करता है कि आपका चैनल आर्ट सभी डिवाइसेस पर सही तरीके से दिखाई देगा।
  2. आपके चैनल का थीम स्पष्ट हो
    बैकग्राउंड का डिज़ाइन आपके चैनल की थीम से मेल खाना चाहिए। उदाहरण के लिए, यदि आपका चैनल टेक्नोलॉजी के बारे में है, तो आपके बैकग्राउंड में टेक्नोलॉजी से जुड़ी छवियां होनी चाहिए।
  3. क्लीन और सिम्पल डिज़ाइन
    बैकग्राउंड को अत्यधिक जटिल और भरा हुआ नहीं होना चाहिए। यह साफ और पेशेवर होना चाहिए ताकि दर्शक आपके चैनल पर लंबे समय तक रुकें। अत्यधिक डिज़ाइनिंग दर्शकों को विचलित कर सकती है।
  4. ब्रांड एलिमेंट्स शामिल करें
    अपने चैनल का लोगो, सोशल मीडिया लिंक, और अन्य ब्रांडिंग एलिमेंट्स को बैकग्राउंड में शामिल करें। इससे आपके दर्शक आपको अन्य प्लेटफार्म्स पर भी फॉलो कर सकेंगे।
  5. रंग संयोजन
    रंगों का सही संयोजन चुनें। यह ध्यान रखें कि आपके चैनल आर्ट में इस्तेमाल किए गए रंग आपकी वीडियो और थंबनेल के साथ मेल खाते हों। रंग संयोजन आपके चैनल को एक पेशेवर लुक देता है।
  6. महत्वपूर्ण जानकारी जोड़ें
    आप अपने चैनल आर्ट में महत्वपूर्ण जानकारी जैसे अपलोड शेड्यूल, वीडियो की कैटेगरी, या कोई संदेश शामिल कर सकते हैं, जिससे दर्शकों को आपके चैनल के बारे में अधिक जानकारी मिल सके।

4. टिप्स और ट्रिक्स

  1. अक्सर अपडेट करें
    समय-समय पर अपने थंबनेल और चैनल आर्ट को अपडेट करें ताकि आपके दर्शकों को हमेशा कुछ नया और ताजगी भरा अनुभव मिले। विशेष अवसरों और त्योहारों के अनुसार भी आप इसे अपडेट कर सकते हैं।
  2. ऑडियंस को ध्यान में रखें
    थंबनेल और बैकग्राउंड डिज़ाइन करते समय यह ध्यान रखें कि आपके दर्शक कौन हैं। उनके पसंद और नापसंद के हिसाब से डिज़ाइन तैयार करें।
  3. वीडियो के साथ मेल खाती हो डिज़ाइन
    थंबनेल और बैकग्राउंड आपकी वीडियो के कंटेंट और थीम से मेल खाना चाहिए ताकि दर्शक सही उम्मीद के साथ वीडियो पर क्लिक करें।
  4. प्रोफेशनल लुक
    हमेशा अपने थंबनेल और बैकग्राउंड को इस तरह डिज़ाइन करें कि वह पेशेवर दिखे। इसके लिए टूल्स का सही उपयोग करें और क्वालिटी पर समझौता न करें।
  5. अनुभव के साथ सुधार करें
    शुरुआत में आपका डिज़ाइन उतना बेहतर न हो, लेकिन अनुभव के साथ आप इसमें सुधार कर सकते हैं। नए-नए टूल्स और तकनीकों को आजमाएं और दर्शकों से फीडबैक लेकर उसमें बदलाव करें।

निष्कर्ष

CSC+Designer_print_wf21G6V9Fe (13)

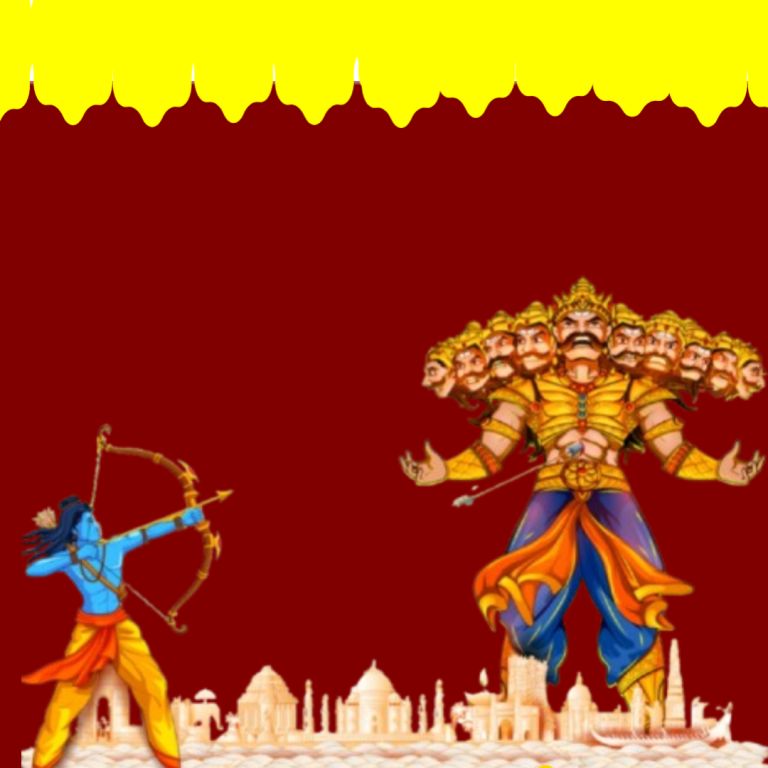
Dussehra

दशहरा उत्सव की परंपराएँ

आर्थिक और सामाजिक दृष्टिकोण

समकालीन समाज में दशहरा